Sunday, November 6, 2011

Cupcake Cuties!

Ok, so I'm not exactly going to tell you how to make cupcakes or show you some super special recipe that no one knows about, but I am going to teach you how to make a cupcake costume all for yourself!  Maybe you want to be a cupcake for halloween or you might just want to wear it to your local bakery and purchase a cupcake, either way, everyone needs to have one of these!!!

Buy all of the materials:
  • Large toy tub (sorry, can't remember what the actual size was, but we got them from target and they are large round plastic tubs with two handles on the side)
  •  5 - 6 pieces of Poster Board - we chose Hot Pink, but you could use whatever color you want, I believe we used 5 or 6 pieces for each cupcake
  • Polyfill - we bought the loose polyfill in a large bag from Walmart, I believe it was $10 - this is more than enough for 2 costumes
  • 1 yard of white tulle
  • 1 package of Pom-Poms
  • Wide Ribbon to use for the straps
  • Duct Tape - we used zebra, but you can just use regular duct tape because you won't see it
  • Hot Glue - LOTS OF IT!!!!!!
  • Last, but not least - WINE, wine and more wine
Anna goofing off before we started -


STEP 1:

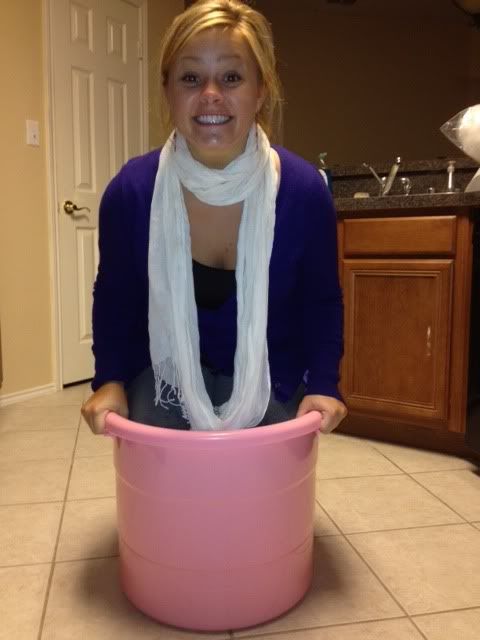
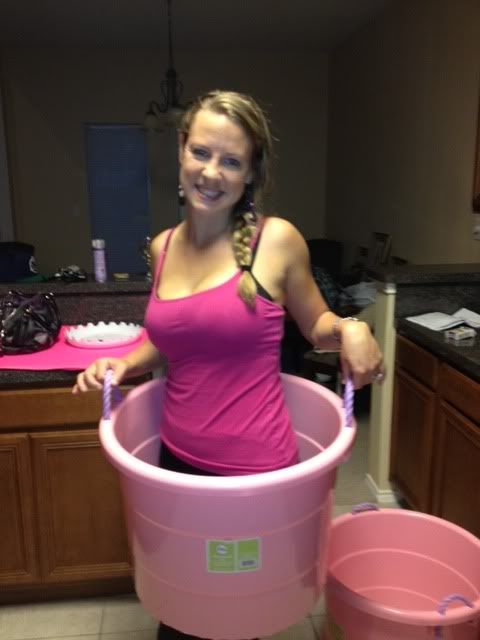
The first thing you will need to do is cut the bottom off of the large tub.  We started cutting it with a saw, but then we were able to use scissors to finish the job!  We initially bought small laundry baskets which were only $3 a piece, but they were  WAY too small!!  I can't believe we actually thought our tooshies would fit inside a tiny little laundry basket.  I guess it looked big until we cut the bottom of it off and tried to fit our butts into it, DIDN'T WORK!


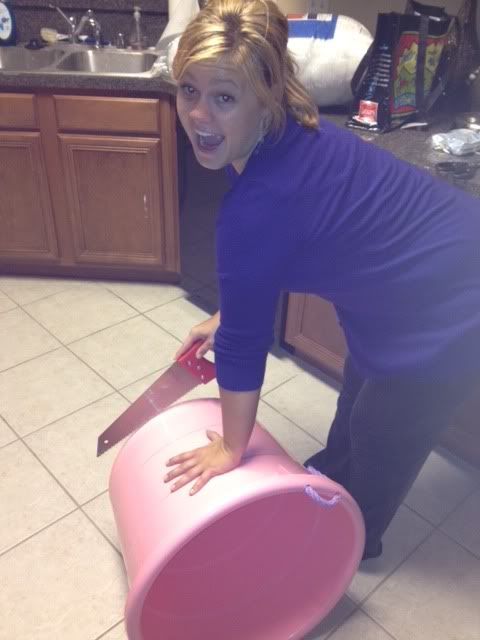
Once we got the bottom of the tubs cut-off we had to pose in them - we thought they were so cute before we even got started!


STEP 2:

Accordian fold the posterboard - we folded each piece into about 2 inch sections.  Once you have 5 or 6 posterboards folded, you need to get the hot glue gun heated and ready to go! 

NOTE:  After we got done with the cupcakes, we realized the posterboard was way too long, so we had to cut it once it was hot glued to the tub.  I would suggest if you would like the cupcake to be shorter (trust me, you do!) to cut it before doing the accordian fold.

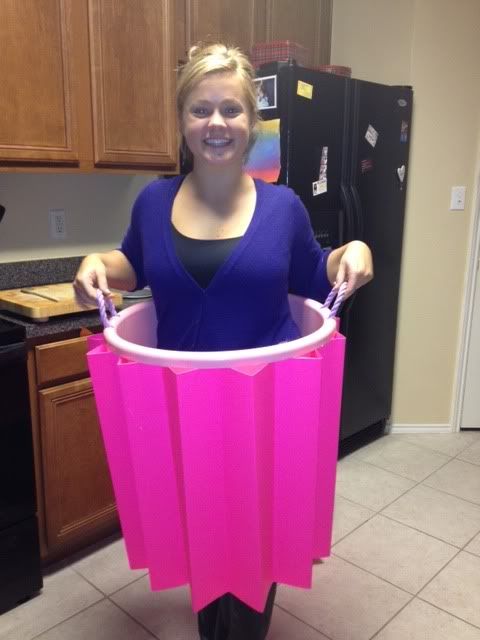
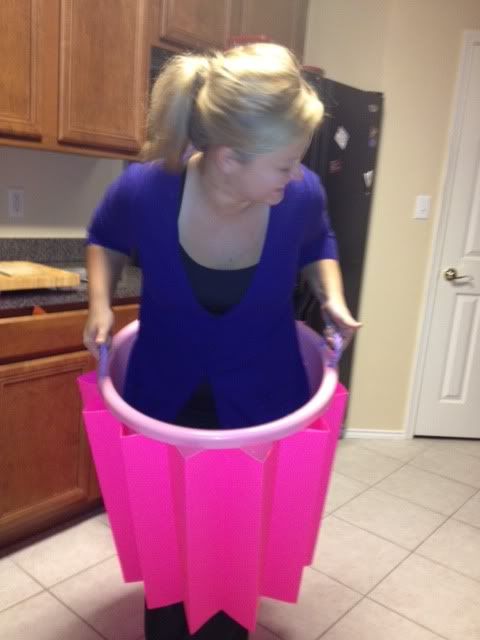
Take the first piece of posterboard and put hot glue onto the tub and stick poster board to it, also do this on the bottom of the tub.  Repeat this all the way around until you have the bottom of the cupcake completed.

Great Job!  You just finished the easiest part of the project.  You should probably stop at this time and drink at least 1 glass of wine, this is a MANDATORY step, DO NOT SKIP!!!  Trust me, you will need this for your sanity :)

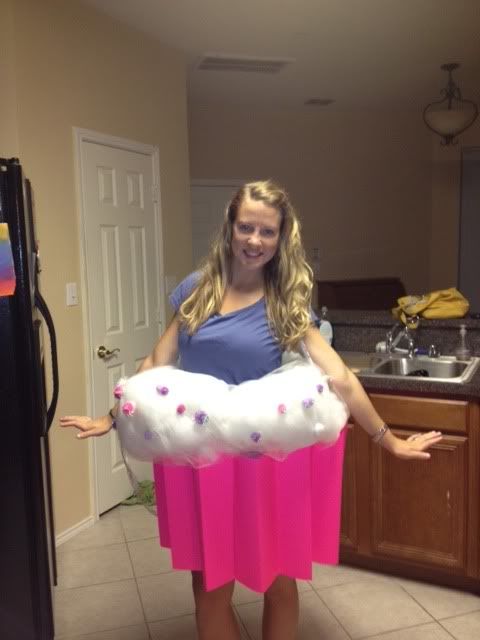
As you can see the cupcakes hit us right below our knees, once they are completed they are much shorter!


STEP 3:

Ok, have you had a glass of wine??  If not, please go back to Step 2, then continue!

Grab a large piece of polyfill from the bag and roll it out into a "long log-like shape". 

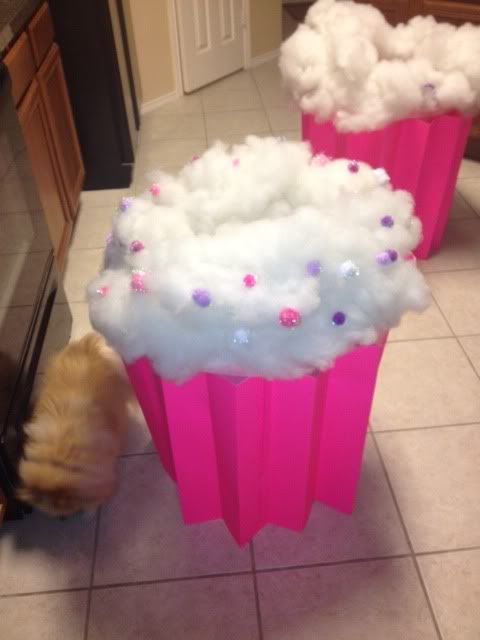
Put hot glue onto the top lip of the tub and stick polyfill down (make sure not to burn yourself, I think we each burnt off a few fingerprints in this process).  Continue doing this until all of the polyfill is glued down.

STEP 4:

This is a step we skipped in the beginning, but is ABSOLUTELY ESSENTIAL!!!! You'll see :)

Cut a piece of tulle large enough to go all the way around the tub and cover the polyfill.  We chose to use duct tape instead of hot glue because we had hot glued our fingers too many times prior to this.

AGAIN, you should probably have another glass of wine or dinner if you haven't eaten any yet :) 

Take the tulle and place over the polyfill, have a lot of duct tape already cut into small pieces.  Tape the tulle down on the inside of the tub and on the outside, inside of the accordian folds.  Make sure the tulle stays in place, this is what keeps the polyfill on the cupcake.

STEP 5:

Glue Pom Poms onto the top of the tulle.  We used some poms from Michaels that were pink and purple with a hint of sparkle.  This is the step you can really show your personality and use whatever combination of colors that you want!

We definitely wanted to stick with the pink theme :)

STEP 6:

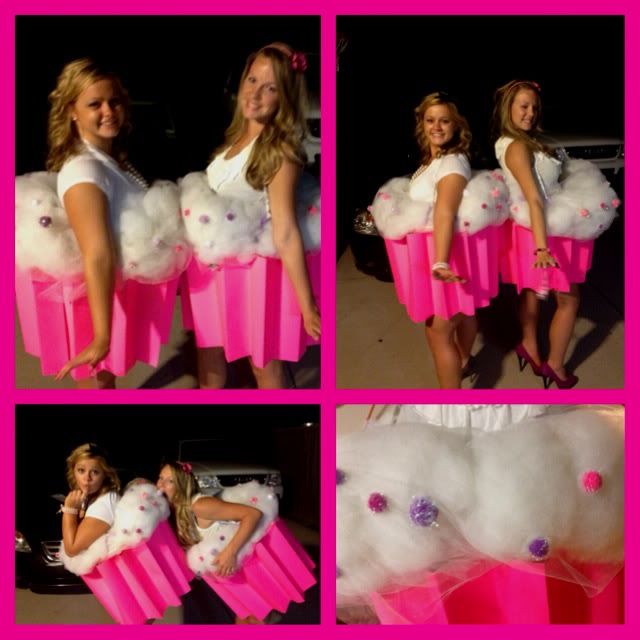
Once your sexy-self is ready to step into public and show-off this insanely cute cupcake costume, you must do the following:
  • Get as girly as possible!!!
  • Extremely high heels, pink if you have them
  • Curl hair
  • Do your make-up as cute as your possibly can, add a TON of glitter!
  • Add cute pink bracelets, earrings, necklaces, whatever you can
  • Wear a white top so it blends in with the frosting
Now, we went as a group of 3.  My friend's boyfriend dressed up as a baker and we ironed "Stud Muffin" onto an apron with a pink cupcake underneath, it was so much fun!

I hope you enjoy making your cupcake costume as much as we did!  Remember, it's a lot of work and you definitely need 2 people, it probably took us about 6 total hours over about 3 days. 

REMEMBER, be patient and the results will pay off!!

ENJOY!


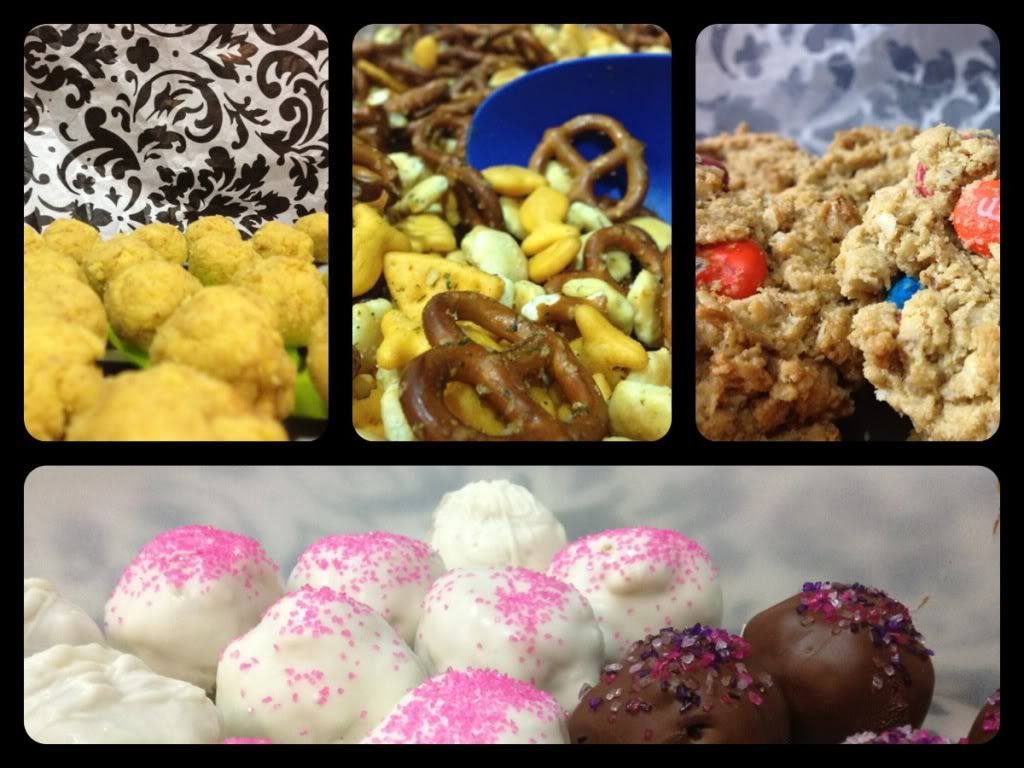
Next time I will give you recipes for all of the goodies shown below, are you hungry yet?  I am, I think I'm going to go eat another cake ball then go to bed!

Tuesday, April 12, 2011

I Scream You Scream, We all Scream for Ice Cream!

Ice cream is by far my biggest weakness, so any dessert that has ice cream in it is going to be a win win with me.  This is one of the easiest desserts you can make and no one will even know that the main ingrediet is, unless you tell them ;)

I was going over to one of my friends house for dinner and decided I would bring the dessert (of course!)  I scowered the internet for the perfect recipe and came across this one from kraftfoods.com.  You will notice that the majority of my recipes come from Kraft Foods, they are simple and only have a few ingredients, so it's the perfect site for me. 

The delicious dessert is.......

OREO and Fudge Ice Cream Cake

1/2 cup hot fudge ice cream topping, warmed
1 tub  (8 oz.) COOL WHIP Whipped Topping, thawed, divided
1 pkg. (3.9 oz.) JELL-O Chocolate Instant Pudding
8   OREO Cookies, chopped (about 1 cup)
12 vanilla ice cream sandwiches

Make It


POUR fudge topping into medium bowl. Whisk in 1 cup COOL WHIP. Add dry pudding mix; stir 2 min. Stir in chopped cookies - I couldn't stop eating this mixture - it was soo delicious!!!
ARRANGE 4 ice cream sandwiches, side-by-side, on 24-inch-long sheet of foil; top with half the COOL WHIP mixture. Repeat layers. Top with remaining sandwiches. Frost top and sides with remaining COOL WHIP. Bring up foil sides; double fold top and ends to loosely seal packet.
FREEZE 4 hours or until firm. Please note: this goes in the FREEZER!! For some reason I put it in the refrigerator and and I was laying in bed when I realized what I did and had to get up and move it to the freezer.  It was definitely a blonde moment!!
 
I also drizzled chocolate over the top, it looked a little plain just with the white cool whip on top.  The mixture seemed to be a little difficult to spread and the the ice cream sandwiches kept moving around, but I just kept pushing them back together with the side of my knife.
 
This was the perfect dessert for a small dinner party, needless to say, me and my girlfriends almost ate all of it - there were only 4 of us.  


If you would like to print the recipe or view the video, visit: http://www.kraftrecipes.com/recipes/oreo-fudge-ice-cream-106562.aspx
 
Until next time....

Monday, March 28, 2011

Baking with Biscuits

I'm excited to share this next recipe that is so easy and oh so delicous!

This can either be made for breakfast or dessert - it's a double doozie :)  We celebrate Breakfast Friday every week at work and you can bring whatever your want.  It wasn't my Friday to bring anything, but I found this amazing recipe, so I wanted to try it out.  Unfortunately, Matt and I ate 4 of the biscuits the night before, so I only had about 8 to take to work....  These are so easy to make the night before and take to work!

Cream Cheese Clouds

The Goods:
1 can (16.3 oz.) refrigerated buttermilk biscuits - I accidentally bought the 8 big biscuits instead of the 12 regular biscuits, but I just cut some of them in half and it still worked out fine.  I seem to always mess up recipes in some way or another, but they always turn out tasting good which is the most important part.
1/2 cup  sugar
1 Tbsp. ground cinnamon
1 pkg.  (8 oz.) PHILADELPHIA Cream Cheese, cut into 12 cubes (You could use 1/3 less fat if you want, but really what's the point...)
1/4 cup (1/2 stick) butter, melted
 

PREHEAT oven to 350°F. Separate dough into 12 biscuits; press or roll each to 1/4-inch thickness.
MIX sugar and cinnamon in shallow dish. Dip cream cheese cubes in melted butter, then roll in the cinnamon sugar - I don't think it gets much better than this!. Place 1 cheese cube in center of each dough circle; gather up sides of dough to enclose filling. Press edges of dough together to seal. Place, seam sides up, in lightly greased muffin pan (I thought about using a cookie sheet, but they might not stick together if they're not in the muffin pan)
BAKE 15 minutes or until golden brown.

I have to say these were actually better the next day when they were cooled off, I ate one hot and the cream cheese burnt my mouth a little, but that didn't stop me from eating another one, YUMO!!!!

These would be delicious served with Fruit and Orange Juice or maybe a little vino if it's for dessert!

Enjoy!


I have some catching up to do with the desserts I've made over the last couple of months, not sure what the next post will be.  Guess it will be a surprise, stay tuned!

Sunday, March 27, 2011

Krafty Baking

It seems like I have my one go to website for all recipes, whether it be cooking dinner or baking desserts.  Kraftfoods.com has been my website of choice for quite a while and I've always found delicious success with it. 

When my friend Leah was nearing the end of her pregnancy, I decided I needed to bake her something delicious to satisfy all of her sweet-tooth cravings.

I stumbled across this concoction of a dessert with chocoloate and peanut butter which are 2 of my favorite things!  Oh yeah, did I mention that I love anything with marshmallows?  Well, I do. 

Drum roll please..... The dessert I made was Chocolate-Peanut Butter Mallow Bars.

All the necessities:
1 pkg. (2-layer size) devil's food cake mix
1/2 cup  butter, melted
2/3 cup milk, divided
3/4 cup  creamy peanut butter
1 jar (7 oz.) JET-PUFFED Marshmallow Creme
1/2 cup  PLANTERS Salted Peanuts
6 squares BAKER'S Semi-Sweet Chocolate, coarsely chopped (Chopping the chocolate seemed to take quite a bit of time, I thought about using a Slap Chop, but I don't have one... Let me know if you have a quicker way of chopping the chocolate other than with a knife)
 
What to do:
 HEAT oven to 350°F.
MIX dry cake mix, butter and 1/3 cup milk until well blended; press 2/3 onto bottom of 13x9-inch pan. Bake 12 to 14 min. or until center is almost set; cool 3 min.

COMBINE peanut butter and remaining milk - the mixture seems to be hard to combine, but keep stirring and the two will combine; spread onto crust. Top with small spoonfuls of the marshmallow creme and remaining cake mixture. Sprinkle with nuts and chocolate; press gently into cake mixture. (I don't really care for nuts in my dessert, so I used much less than the recipe called for, I might not even use nuts next time).

BAKE 18 min. or just until center is set. Cool completely before cutting into bars

This is one of the easiest desserts I've made and it's delicious right out of the oven or even the next day!

Feast your eyes on the deliciousness:


A partially eaten ooey gooey piece:


Let me know what you think about it!  Stay tuned for the next post, Cream Cheese Clouds!